Wednesday, January 25, 2012

Liebster Blog!

Hello All,


I was so pleasantly surprised to see Denise's message on my blog that I am sure I must've blushed! :) Thank you SO much Denise, you're the sweetest! I am really glad you chose my blog for such an honour :)


The idea of the Liebster Blog Award is to spread the love from one small blog (under 200 followers) to other small blogs. This helps to spread knowledge and readership. 


To accept the award, you must:

1) Link back to the person who gave it and thank them for thinking of you.
2) Post the award to your blog.
3) Give the award to 5 bloggers (with less than 200 followers) that you appreciate and value.
4) Leave a comment on the blogs of the five people you have chosen to let them know.

"Liebster" in German means "dearest", so to carry on the Liebster tradition, I am going to pass the award on to 5 people who's blogs have been an inspiration to me and my crafting.  To be honest, passing this on will be difficult as there are so many wonderful small blogs that have inspired me.  It will be a challenge to chose only 5.

My picks would be:

Susan - She makes the most wonderfully aesthetic cards and is the one who got us all addicted to Beehive technique (which I seem to never stop using :D).....
Cecelia Louie  - For her wonderfully inspirational blog! She must be one woman with many heads as she wears so many hats at the same time! Paper cutting, quilling, paper folding........you name it, she does it, and with such a stylish twist :)
Manuela Koosch - Needs no introduction! Perfectionist to the core, I had a tough time believing that she cuts the strips manually (sometimes, as thin as 1 mm) and makes such fantastic designs!
Philippa - For being the visionary she is. In her own words - She is constantly pushing the boundaries of quilling and reinventing the art :)
Vilma- For being the ultra-stylish jewellery maker! Whenever she posts, I go WOW!

Thanks once again to Denise for honouring me with Liebster Blog award! :)

Hugs - Pritesh

Monday, January 23, 2012

Spiral roses tutorial

Hello All,

This post is again a quick post, just to post a tutorial as I was struggling with making my spiral roses right! A lot of people make spiral rose tutorials, mine is just an attempt at sharing small tips that help me get a seamless look to my roses :)

Please notice the small things:

1. I cut the outermost edge of the spiral to avoid the 'hollow' at the centre of the rose that you'd get if you kept the tapered end.
2. I use the centre of the circle for gluing the spiral rose, it gives a very continuous unfurling of petal look :)
3. The 'width' of the spiral decreases as I reach the centre. This will make the 'petal' slant outwards as you curl them with decreasing height. No idea about you but I loved that proper spiral look :)
4. At around 0:48, I cut a small part of the spiral to round off the cut. This again helps make a continuous looking rose :)

So, here is the video (followed by the traditional snapshots (for one of my closest "Blends" - Sonia) :)


Snapshots:


Happy Quilling PS: If my posts inspire you to create something on similar lines, I feel highly flattered. But please, do respect the effort I take in conceptualizing and executing, please give a direct link to my work when you are inspired by mine. Thanks for understanding........:-)

Friday, January 20, 2012

For Priyanka - Finished the pending card too :)

Hello,

This is a post dedicated to Priyanka Gupta, the girl who saved me a lot of time by introducing me to the manual shredder. The shredder changed the way and the amount I quill..........so I owe you so much girl! Here's wishing you a happy beginning......of a new life, a new way of looking at and living life.......:-) With this, my pending work is also over..........


The hearts are filled with an all time favourite beehive technique and the white outlines are gilded with gold glitter pen :)

Entering this for

1. Crafty Creations Challenge #153 (theme Valentine)
2. ICR Challenge no. 14 (Clean and Simple)


3. Homyachok Challenge No. 1 (Merging Hearts)


4. Crafty Boots Challenge (new beginnings)
5. Ooh la la Creations Challenge no 96 (New Beginnings)

Happy Quilling

Pritesh
PS: If my posts inspire you to create something on similar lines, I feel highly flattered. But please, do respect the effort I take in conceptualizing and executing, please give a direct link to my work when you are inspired by mine. Thanks for understanding........:-)

Thursday, January 19, 2012

Bid Adieu

Hello All,

A quick post again...............my last order in Sweden. The person wanted a more filled up look compared to what Aadyaa offered, so I had to work out a scheme so that the monogram was well surrounded by colour :) The background is not black, it's a beautiful rich brown but then...........I am not lucky enough to get daylight!


I hope this leads to customer satisfaction and I leave Sweden on a happy and satisfied note! I will pack my quilling stuff away today (no more excuses Pritesh!) and take a good one month break from quilling now!!!!!!!! Bidding Adieu to Sweden :)

Happy Quilling

Pritesh

PS: If my posts inspire you to create something on similar lines, I feel highly flattered. But please, do respect the effort I take in conceptualizing and executing, please give a direct link to my work when you are inspired by mine. Thanks for understanding........:-)

Monday, January 16, 2012

Indian Crafts Room Challenge - Sum up :)

Hello All,

This is a post filled with my contributions to the Indian Crafts Room Challenge 14 (I am SO sorry Ash, for not having linked back all this while!)......


Here are all my entries (I seem to be addicted heavily) :D


Happy Quilling

Pritesh

PS: If my posts inspire you to create something on similar lines, I feel highly flattered. But please, do respect the effort I take in conceptualizing and executing, please give a direct link to my work when you are inspired by mine. Thanks for understanding........:-)

Sunday, January 15, 2012

Tutorial triplet :)

Hello All,

This is going to be a long post.........there are three tutorials here! Hehehe, my Pongal euphoria and a Pongal treat to everyone :)

Tutorial 1: Nur Syaz's Zig Zag Petal Flower :)

When I saw this flower on Nur's post, I so wanted to try my hand at it! It looks so cool and yet, so easy too :)

This is how one petal looks (you can join many to make a complete flower :)


Here is my video for making the flower :) Thank Nur, for allowing me to post a tutorial and I apologize if I have not done it the way you did, this is my interpretation of how you may have made the petal :) (Sorry Sonia, the snapshots will have to wait :))


Tutorial 2: Noor Azlina's multi-colour combing flowers

I was so impressed by the riot of colours in Noor Azlina's post that I absolutely HAD TO try those lovely flowers! Mine are nowhere as pretty as hers but I guess, this post can help a lot of people make these super simple flowers :)


Here is the video for how to make these petals :)


Tutorial 3: Brush Embroidery for cards

I can not remember now who posted this video on Facebook but this instantly gave me an idea for using my 3D outliners that I barely ever use for card-making. So, I decided to put them to use in a similar way. In a following tutorial, I will post a video on how to make your own shades for 3D outliners :)


Go ahead an experiment with various version of this (whatever you can think of!) :) Sky is just the beginning......

Happy Quilling

Pritesh

PS: If my posts inspire you to create something on similar lines, I feel highly flattered. But please, do respect the effort I take in conceptualizing and executing, please give a direct link to my work when you are inspired by mine. Thanks for understanding........:-)

Happy Pongal - Quilled Kolam :)


Hello All,

At the outset, my family and I wish you a very happy Pongal/Makar Sankranti. Pongal (in Tamil Nadu) and Makar Sankranti (in some parts of the country) are some the harvest festivals in India. My husband and I hail from two different parts of India and the festival is celebrated differently in our places. But the spirit of the festival remains the same - thanking Mother Nature for bestowing us with prosperity in form of good harvest. :) I love this culture of thanking Nature for helping us :)

Here is my colourful and highly symmetrical (12 fold symmetry) wish for all of you out there.........may Mother Nature bestow on your good health and peace of mind. Happy Pongal/Makar Sankranti.......


Happy Quilling

Pritesh

PS: If my posts inspire you to create something on similar lines, I feel highly flattered. But please, do respect the effort I take in conceptualizing and executing, plea

Friday, January 13, 2012

More box-lid templates

Hello All,

Here are some more templates for the dust-proof boxes for quilling :) (quilling motif depth remains 2 cm)

Hexagonal Box

Triangular Box


Happy Quilling

Pritesh

PS: If my posts inspire you to create something on similar lines, I feel highly flattered. But please, do respect the effort I take in conceptualizing and executing, please give a direct link to my work when you are inspired by mine. Thanks for understanding........:-)

Thursday, January 12, 2012

Dust Proof Quilling Boxes - Tutorial

Hello All,

Addiction quilling! These two words sum up my state right now! Hehehe. In the Indian Quilling Guild on Facebook, there started a discussion about how to prevent dust from settling on our quilling projects! It IS a big problem in India, where things are dusty. Well, for bigger projects, one can always use shadow boxes but what about those cute little gift boxes we want to adorn with quilling?

Ah well, my idle mind got to work (actually, I had been thinking about it for quite a while now, since Aditi posted the query on IQG page!) and today, finally I could finalize the design of my dust-proof DIY project for quilling boxes :)

This is how they looked at the end (sorry for the bad quality picture):


The materials I have used are:

300 gsm Indigo card paper
Overhead projector transparency sheet

Voila! That is ALL that you need. Here is the video (pls excuse the background noises, I don't want to overwrite the sound at midnight :D):


As with my previous tutorial, the possibilities of variations are literally endless! You can change the shapes (and modify the sketch accordingly). I will try to post templates for triangular, circular and hexagonal boxes but feel free! ANY shape is possible if you work on the design.

I haven't pasted anything on the inside base but if you want, you can paste a scrap paper there and beautify te box even further. The upper edge of the transparent part can also be adorned with various embellishments. Just GO AHEAD an tinker around, let your creativity loose.

I don't yet know how to upload a downloadable document in a blog (I wanted to use only an A4 sheet, so I stuck to that but you can vary the sizes as you wish) but here is the image:


I used 2 cm depth for quilling motifs but you can vary the depth depending on what type of quilling you want there. I took a picture of the template I used and here it is:


The dotted lines are for folding and the solid lines are for cutting. Except for the inner square on right side. It is for cutting but I wanted to be able to see the pencil line underneath so I have made it dotted. The final dimension of the box is 10 cm x 10 cm. What I have made is the lid, you can make the box underneath, using any simple paper folding box tutorial from Internet. :) I have used some random quilling elements I had handy for pasting in the box but you go ahead - design your own! As I always say: Sky is just the beginning! :)

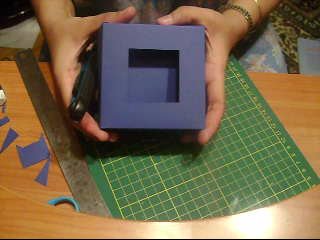
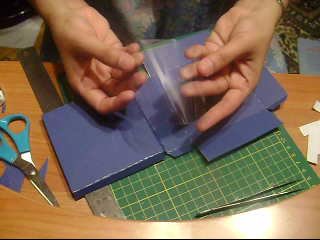
And well, my traditional video snapshots (in honour of Dr. Sonia, who is an AMAZING crafter and never refrains from posting tutorials of her work) follow:


Entering this for Pollycraft challenge (#122 Anything but a card)...

Happy Quilling

Pritesh

PS: If my posts inspire you to create something on similar lines, I feel highly flattered. But please, do respect the effort I take in conceptualizing and executing, please give a direct link to my work when you are inspired by mine. Thanks for understanding........:-)