Sunday, November 17, 2013

Rapunzel, Rapunzel, Let Down Your Hair.........


Hello All,

If I say I've been bursting with things to say, I'd be grossly understating it........

After two months of working, here I unveil the very pretty, coy and colourful Rapunzel......


At the outset, let me clarify that this is NOT my design. The original of this is a digital painting by Barnali Bagchi, which has been adapted (heavily in places, actually) to quilling. I can never thank the lady enough for creating a stunning piece that I couldn't resist quilling.......

For the first time in my quilling career, I spent 1.5 months just figuring out how to convert this painting to quilling. And as usual, there were anxiety pangs about whether I could even make it at all!

The most daunting factor in this painting was its size. Massive is more like it. The painting stood at 3 feet x 4 feet and I literally stared at the blank board, alternating between escapism and determination. Finally, I got started and the first part (quillographed outline) was a song. Once the hair started, my nightmare began. It was only much later that Barnali was kind enough to inform me that the dame's name is Rapunzel! For almost 1 month, I made JUST tresses! Some snippets from the WIP (work in progress) times.......


Pre-beginning printout, which is a compilation of 8 prints of A3 size.....

Version 1 of the lady's face (which was scrapped to make a better once later)

A bit of progress :)


And this should put the size in perspective :)

The flowers getting added up

The never-ending tresses! Rapunzel indeed

Nearing completion

Version 1 of background, which gave way to a different one later on

Nearly over, just a little short of completion......

And one of those rare times when I have a photo of me working on the project :) Thanks to my husband for this :)


I also have to thank Manali for doing the beehiving on the right arm of the "moon" Rapunzel is perched on. Thank you to Richa too, for doing the left arm of the "moon" :)

Happy Quilling

Pritesh 

Friday, November 8, 2013

Fifty three strips and three ml of glue

Hello All,

It is a terribly belated post but one that had reasons for getting delayed. A happy event in the family kept us all busy......so, here comes......

When this order was placed, the original idea was completely different. It was to be a "fall" theme name plate. Then came the change and it got to "abstract" and then, Yulia's "Noel" was given as a reference......

Now, when someone cites Yulia Brodskaya's work as a reference, you know you've got an impossible goal to meet. And it probably is wiser to not even try! ;) That is what I ended up doing.......I decided to throw in a bit of henna designing (the oh-so-Indian patterns) and spring colours......this is for the first time literally that there hasn't even been a rough sketch. It was just an idea that kept moving my hands.

To all the people who aspire to try quillography, this piece used up a total of 53 quillography strips and is 10 inches by 16 inches. Apart from the glue needed to glue the background of the piece, I used a total of 3 milliliter of Fevicrylk Fabric glue to make the entire quillographed nameplate. THAT is how less of material is really needed for quillography :)


Some details of the name-plate......


Happy Quilling

Pritesh

PS: If my posts inspire you to create something on similar lines, I feel highly flattered. But please, do respect the effort I take in conceptualizing and executing, please give a direct link to my work when you are inspired by mine. Thanks for understanding........:-)

Thursday, August 29, 2013

Peacock Edition 2

Hello All,

Back from an illness break and here we go - yet another peacock.........

When work has already started but the order gets cancelled, one doesn't quite feel like abandoning it! So here goes a project I loved making and had generous help with :) Thanks to Richa for being a backbone throughout :) This was to be my second blog anniversary post, so a bit belated, here comes the National Bird of India, the second time around. The first one made the life so easy, because I had finished struggling with the feathers already! :D


And some more details:


Happy Quilling

Pritesh

PS: If my posts inspire you to create something on similar lines, I feel highly flattered. But please, do respect the effort I take in conceptualizing and executing, please give a direct link to my work when you are inspired by mine. Thanks for understanding........:-)

Jewellery waterproofing brigade

Hello All,

After being swamped with questions about what waterproofing aids I use, here is the image of all my waterproofing sprays and varnishes. And pleeeeeease, there is NO cut and dried answer for which one to use for which kind of jewellery. It all depends on your preference, the kind of elements in the jewellery, the finish required etc. So a judicious judgment has to be made according to the situation encountered. 

I apologize in advance but I shall no longer answer the question "How to waterproof quilling jewellery?". The image is here (of the material), the process is already public information through this post and the end results are seen through the quilling jewellery photos I've posted often...........


(L to R) Winsor & Newton Charcoal spray, available in Pune, priced at Rs. 970, recommended for matte finish

Asian Paints Touchwood Varnish, priced at Rs. 120 or so, available in any hardware store, not recommended for white jewellery

Asian Paints Clear Synthetic Varnish, more viscous than Touchwood but easier to use on white jewellery, still lends a slight yellowness on whites

Schjerning Krystal Fixative (from Panduro Hobby, Sweden), recommended heavily for quick waterproofing (dries much faster than Winsor Newton spray), priced at 159 SEK (~ Rs. 1600), it is not available in India at all


All of them are good for waterproofing and provide strength but varnishes (after a few coats) lend almost a plastic like finish + strength. I am personally not a fan of it and lean on the matte side, but it is a personal preference. You need to experiment with these yourself and find what works for you..........

Happy Quilling

Pritesh

PS: If my posts inspire you to create something on similar lines, I feel highly flattered. But please, do respect the effort I take in conceptualizing and executing, please give a direct link to my work when you are inspired by mine. Thanks for understanding........:-)

Tuesday, August 27, 2013

Give me your brains :D

Hello All,

After what seems like forever, I am back, up on my legs, walking, talking AND working! I was overjoyed when Helen sent me an e-mail : Grey Matter in Quilling - Lend me your brains :D I couldn't help laughing out loud! This lady sure knows how to evoke a laugh! :) She was going to write a feature in an Arts and Crafts Magazine about unusual (read "non-floral" quilling).....this was an honour beyond honours! :) She has always been dropping by my blog and leaving behind most honest (my favourite kind) comments. It was she who once before had given me a chance to be a Guest Designer on Homyachok Challenge blog :)

So, here goes, the article on unusual quilling, where the quilled brain finds a mention :) How I wish I knew Russian!!!!!

Thanks a zillion Helen :) Even being mentioned in the same breath as these biggies is a dream you've brought to life :)


Happy Quilling

Pritesh

PS: If my posts inspire you to create something on similar lines, I feel highly flattered. But please, do respect the effort I take in conceptualizing and executing, please give a direct link to my work when you are inspired by mine. Thanks for understanding........:-)

Wednesday, August 7, 2013

Paper spiral video tutorial

Hello All,

Have you seen those perfect spirals some quillers use as stems for creepers? I love them and tried my own method of making those.

As promised, here is the tutorial for making those. The video isn't particularly high quality (my good camera is broken and I'm using a pretty outdated one) but I think, the concept is highlighted pretty decently.


Happy Quilling

Pritesh

PS: If my posts inspire you to create something on similar lines, I feel highly flattered. But please, do respect the effort I take in conceptualizing and executing, please give a direct link to my work when you are inspired by mine. Thanks for understanding........:-)

Wednesday, July 31, 2013

Peace, Harmony and Love

Dear All,

A super quick post about a project that I finally managed to make after all kinds of hurdles posing themselves in my way! :( A peace symbol, a white dove :)


The wings are made of endless fringing (and my inspiration for fringing remains Meg Crawford, who fringes SO beautifully and patiently!).........

The body of the dove is made of clay and covered with tear drop punches, made using Martha Stewart teardrop punch. Rest is pretty self-explanatory :) If I didn't hate fringing so much, maybe, I'd make some more birds! Haha!

Happy Quilling

Pritesh

PS: If my posts inspire you to create something on similar lines, I feel highly flattered. But please, do respect the effort I take in conceptualizing and executing, please give a direct link to my work when you are inspired by mine. Thanks for understanding........:-)

Wednesday, July 24, 2013

A quick nameplate

Hello All,

I have been so inactive that I almost feel like a potato at this moment! :( In-laws are away and my neck is paining so bad that I feel like my head would roll off from over my shoulders any minute now! :( Work is so far behind the schedule that I am doubtful I will ever catch up! :(

I got a call from a friend who wished a quick nameplate to be made. I didn't have the heart to say no and the neck pain was not that bad at the time. A commitment made is a commitment made. And my job was already made easy by providing the background colour and the palette I had to work with. BUt still, I had to pop a painkiller and get back to work.........here are two images: One of the finale and one, a collage of work-in-progress......


As usual, there are always firsts...........this one was the first time I used multiple strips at once, while working. The font was so tricky, it needed me to be using more than one strips, or else, I could never have probably gotten it working.

I know, this is not the best I can make but darn neck pain needs to go! :(


Happy Quilling

Pritesh

PS: If my posts inspire you to create something on similar lines, I feel highly flattered. But please, do respect the effort I take in conceptualizing and executing, please give a direct link to my work when you are inspired by mine. Thanks for understanding........:-)

Monday, July 15, 2013

Composite element flower petal tutorial

Dear All,

A couple of days ago, while working on a project, one of my students and I made this flower. It is a delightfully simple flower and here goes the tutorial for the same....... please note that we don't own the design. I am merely posting the tutorial because I was asked to....


The colours used are: White, dark pink, light pink and lavender


Happy Quilling

Pritesh

PS: If my posts inspire you to create something on similar lines, I feel highly flattered. But please, do respect the effort I take in conceptualizing and executing, please give a direct link to my work when you are inspired by mine. Thanks for understanding........:-)

Friday, June 28, 2013

Make your own half-pearls - Tutorial

Hello All,

This post may sound specific to Indian crafters but essentially can be used by crafters anywhere. In India, I find it particularly difficult to find large half pearls. In Pune, I still haven't been able to locate one single source. And besides, their colours are limited. So, what do I do? :D Make my own pearls, obviously! ;) Necessity is the mother of invention, after all! :D :D

Here is a picture tutorial.

Materials used:

1. Children's colour palette (available for Rs. 6 in Venus Traders, Pune). It should be easily available practically everywhere!
2. Air-dry clay (I bought mine from Panduro Hobby in Stockholm but it should be easily available in most stores. M-Seal and Polymer Clay are other options that should work).
3. Fevicryl pearl paints (I have used pearl metallic white here, but feel free to choose from nearly 25 shades available with them). In addition, you can create patterns on top as well! Feel free to experiment.........


These make very exciting flower cores, according to me :) So, whether it is a quilled flower or punch flower, this core will make it very easy for you to choose exactly what shade of the the "pearl" you want in the centre :)

Some follow-up pictures..........you can use a 3D mini-mold to make pearls in a variety of sizes. Like this:


And they end up looking like this (these are crude still, unpainted)


Happy Quilling

Pritesh

PS: If my posts inspire you to create something on similar lines, I feel highly flattered. But please, do respect the effort I take in conceptualizing and executing, please give a direct link to my work when you are inspired by mine. Thanks for understanding........:-)

Saturday, June 15, 2013

Tutorial - Dimension addition to quilled flowers

Hello All,

I'm sure most of us have seen quilled flowers that are neatly off the base and look like you could pluck them off the board :) There exist methods to make such "dimension added" flowers. One of the methods is to use silicone (it's not silicon peoples, silicon is blackish blue in colour and very hard) glue. I, as a crafter, find it messy. Even as a researcher, I never found it an easy material to work with. Having cured silicone for almost a year for a research project will keep me away from it for life! :D

A sample of how flowers made using the technique demonstrated below can be used to make a frame:


So, I used a technique I had learnt in class II as a replacement, namely, using a paper cone. Here is a photo tutorial to demonstrate how.........this one goes out specially to Manjit Kaur Bhalla, who asked me for the tutorial :)


Happy Quilling

Pritesh

PS: If my posts inspire you to create something on similar lines, I feel highly flattered. But please, do respect the effort I take in conceptualizing and executing, please give a direct link to my work when you are inspired by mine. Thanks for understanding........:-)

Friday, June 7, 2013

Quilled National Bird.........

Dear All,

Quilling a peacock had been a long-standing dream of mine :) So, when Shital asked me if I would do a peacock, I jumped but almost immediately followed panic attacks. For anyone who has seen a peacock up close, figuring the plume colours out is like trying to count the number of cells in out body! It's a spectacularly beautiful bird, and correspondingly difficult to quill!!!!!

Here we go with the finished project :)


Stage 1 was simplified greatly by Shital by providing the base on which  the peacock was to be made. And Stage 2 stumped me for quite some time. The correct blue was impossible to find in shimmer texture. I scoured the old city markets but the correct blue seems to have disappeared from the face of this Earth! Bless Fevicryl, they keep coming up with products that have often been life savers for my craft needs!!!!!

The latest (HEAVILY recommended) range of sparkle paints came to my rescue. The hues in these paints are brilliant and affordability? Ah, Fevicryl style, they are extremely reasonably price :) So, I took the waste paper left over from paper cutting for text strips and painted sheets after sheets in the blues and greens. I wish I had taken photos of that too! Thanks to high humidity, the papers took forever to dry and forever looked soggy from all the paint......

To make the body of the peacock look 3D, I resorted to Panduro air-dry clay. I'm no clay expert, so please excuse the undulated surface! :D I randomly cut out another waste paper (left over from sample printing) into  peacock body shape and adjusted clay to the shape.


Making the peacock body feathers was the most strenuous part of this project. I used my Martha Stewart teardrop punch for punching out really small tear drops of the sparkling blue paper. Then started the arduous task of fringing these teardrops with a width of ~ 0.3 mm. My eyes are probably hurting because of this strain ;) But after about 300 of these, the upper body of the peacock began to take shape :)


Peacock doesn't really make your life easy! :D It's "flying wings" are random shades of black, white and brick red. My empirical methods came to the rescue! :D I drew random lines on white paper and thus resulted the flying wings of the peacock :)


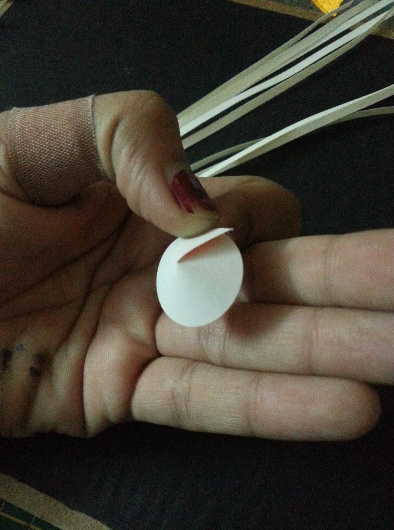
The plume "base" was again air-drying clay, flattened to provide a shallow base for the feathers to rest on top.

It was the GREEN of the feathers that took maximum creativity! Phew! I have used Sparkle Pearl Green by Fevicryl as the base. On top went hints of Sparkle Pearl Blue and Sparkle Pearl Violet. The slightest tinges of brownish are Daler Rowney Bronze acrylic paint, which was used by dabbing a cotton ball in the paint and then tinging VERY lightly over the feather. This "process" took almost 15 iterations to get right! My room looks like a peacock has been beaten to death there, with so many "feathers" lying around! ;)


The "eyes" of the feathers are made out of 1 mm strips hand-cut out of 120 gsm beige shimmer paper. The tight coils were shaped and then, coloured from top. The colours remain the same, except green, which is Pearl Green by Fevicryl.


The rest, I think, is pretty self-explanatory. :) I HAVE TO thank my feedback system here :) 

The first in this list is Pri, who communicated right at 6 am or so (IST) and planted the 1 mm strips idea in my head :) You're a DARLING lady! You have no idea that I owe you my career :)

Second is a very what-you-see-is-what-you-get lady, who has never let me down. She always provides honest feedback, whether I like it or not ;) So, a MILLION thanks Ketaki

My life line, my baby, Baba always has been a pillar of strength, the one who managed to talk me into quilling, in the first place! :D As always, her feedback was forever available, so that Didi never wavered from her task at hand :)

One lady who has never failed at giving me feedback, that too in detail, is Manu. She diligently writes back, not just with feedback but also, suggestions about what and how I can use to make my projects better. 

And yeah, thanks to other people who put up with my incessant Whatsapp messages! Thanks Tarun, Sanasi, Meg, Yamini! You guys mean a LOT! Keep twisting my ears whenever you feel I'm losing focus :) 

Happy Quilling

Pritesh

PS: If my posts inspire you to create something on similar lines, I feel highly flattered. But please, do respect the effort I take in conceptualizing and executing, please give a direct link to my work when you are inspired by mine. Thanks for understanding........:-)